If you are one of those lucky Cricut owners, you can disregard this entire tutorial. Scroll down to the bottom to see read some gift giving ideas. :)
First you will need the letter, number, or shape/outline that you have printed or drawn out. You will also need a sheet of vinyl in the color of your choosing. These sheets can be purchased at craft or hobby stores. I got mine by the vinyl letters in Hobby Lobby for less than $2 a sheet and it only took one sheet to do the door and the plate. You will also need something to cut with. You can use scissors or a scrapbooking tool, like I have below. It's just a razor blade with a pen handle, more formally known as a light duty utility knife.
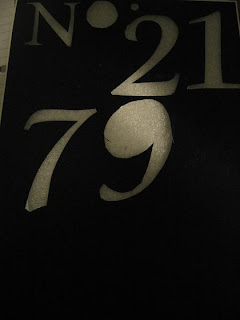
You can see the area where I cut my numbers out in this pic. The font for my door numbers was Cataneo BT. I set the font size for 368 for the numbers. The actual "NO." was done in New Times Roman font, font size 200. It will not display numbers that big in Microsoft or Open Office. All you have to do is click on the tab for font size and it will highlight then you can type in the size you want.
After that, lay your outlines on top of your vinyl sheet and start cutting. Keep your hand on the paper so the layers don's slip around and don't forget to put a mat underneath if you are using a utility knife. You definitely wouldn't want to have a furniture refinishing project lined up for you afterward!
Finally, pull the whole thing apart, keeping the backing attached until you are ready to place the lettering. After that, it's as simple as sticking a sticker on.
Here is where my "E" went. Sorry about the dark picture. My camera flashes so bright that it washes everything out so it was this or bright blur. :(
The possibilities are endless with what you could do. You could make a santa hat in red or stocking. You can put them in a frame, on a canister, on your tater bin, trash can, galvanized tin, christmas ornaments, or candlesticks. I can see a really cut gift of a clear antique canister monogrammed with vinyl lettering and filled with cookies for Christmas or a galvanized bucket with the outline of a mascot and filled with peanuts, beer and a sports cushion! If you fear you aren't crafty enough to do this project, I assure you you are but for bigger projects there is always the option of ordering. I just put up some lettering that I had ordered last night.
Oh the things I could spruce up with sticky vinyl!!!
Happy Crafting!


Vinyl Sliding Doors Replacement
ReplyDeleteA very good and informative article indeed . Nice post Dude keep it up. I have appreciate with getting lot of good and reliable and legislative information with your post......