The solution is very simple and only adds about 4" of the more expensive fabric.
First figure out how big you want your pillow to be. My pillow size is usually determined by what I find at... Goodwill!!! I buy pillows in good condition there. I take them home and put them directly in the washer on hot and then dry them in the dryer. That puts my cost between $2 and $4 for each pillow insert. Most inserts average $8 to $25 per insert, depending on size. Here is my Goodwill before pic of the pillow we are working on. It was actually in pretty good condition but it didn't match my living room. ;)
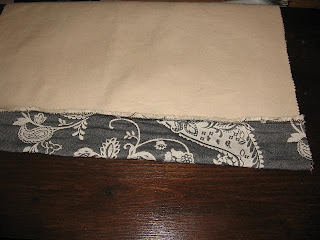
After you get the insert, you can make the pillow cover to fit. Just add 4" to the side that would be the front. Don't forget to add about a half inch for seams. Then make the backing 4" less. It should look like this if they are laying on top of each other. In this picture, I've already sewn one edge of the two fabrics together in this picture. I've flipped the side over so you can see.

You can sew the pillow completely and use the stuffing or leave the the bottom edge open. Just be sure to hem the edges and include a zipper, buttons, or ribbon to shut the opening.
Here is where the trick comes in. When you go to sew the sides of your pillow, sew the pillow so that a few inches of the front fabric will be bent over the top and bottom of the back of the pillow. Use about a 3" inch overhang at the top and a 1" overhang at the bottom.
The inside top corner will be where my finger is pointing in this picture below. Just start sewing the side seam there.

The end product should look like this from the back. This picture is of the top but the bottom looks the same, just a little less overhang.

It doesn't look like much of a change but the results speak for themselves. Here is the pillow we just made compared to one that has been made with the standard "fabric cheat". You can't even tell we cheated!
There are several ways to do this. Adapt this as you wish. The openings can be changed and moved to the middle of the backing fabric, etc. Next time I do a tutorial with this much detail, I'll upload a video. If you have any questions, just ask and
Happy Halloween!!!!


No comments:
Post a Comment